- Don't Get Left Behind
- Posts
- Custom GPTs: The Most Powerful Tool You're Probably Not Using
Custom GPTs: The Most Powerful Tool You're Probably Not Using
One time I outsourced my brain for cash.
Tom Babb
January 22, 2025
Personal note: Sorry it's been a bit. I'm trying to write more. I'm telling you this so I do it.
If you're going to skip this, at least scroll to the bottom and read my confession of a real AI addict.
For the following, you need access to Chat GPT Pro which is $20/month. It's worth it – trust me. If you build one of these, I would love for you to reach out and tell me about it.
I’ve been waiting to share this one because it’s a bit more advanced. But I think you’re ready: Custom GPTs
What’s a custom GPT? It's an AI trained on your specific information. Think of it as a private brain you can build for:
Your business – SkyFi has one. It's private and only accessible by my team.
Special projects – Like my AI music generator.
Your life – Yes, I literally trained one that knows me.
The value is in the knowledge base. A knowledge base is a custom pool of information for AI. You fill it with documents about your topic – more on that below.
Ready to build one? Here’s the quick-start guide:
1. Open ChatGPT and Find the Custom GPT Option
Log in to ChatGPT. On the home page, on the left panel you’ll see an Explore GPTs button. Click it.
2. Create a New GPT
In the top right corner, there’s a + Create button. Click that to start building your GPT.
Once you click create, click Configure. Configure is for people who cannot code and it works just great.
3. Name Your GPT
Choose a name that reflects what it’s for. Examples:
“SkyFi GPT” for work projects.
“Personal GPT” for life tasks.
Be specific so you can easily identify its purpose later.
4. Add a Description (Optional)
You’ll see a description box. This doesn’t affect how it works, but it’s helpful to summarize what the GPT is for—especially if you plan to create multiple GPTs. Which you should do.
5. Write Instructions
This part is crucial. Add clear instructions to guide the GPT. Here’s what I use:
“Always check the knowledge base before responding.”
6. Upload Your Knowledge Base
Remember I said the knowledge base is the most important part. Here’s where the magic happens:
Best Practice: Consolidate all relevant information into a Google Doc, export it as a Word or TXT file, and upload that.
Collect supporting documents like resumes, project notes, spreadsheets, Word files, and PDFs.
Consider uploading your entire website content or even a competitor's website for reference.
Ensure the files are organized and include key information. (Formatting doesn’t have to be perfect!)
Click the Upload Files button and select your documents.
7. Set Your Capabilities
IMO, the only one that matters is Web Search, but if you see something you like, check it. It doesn't hurt to check everything.
8. Save and Test
After uploading, in the top right corner click Create (if you've already created this will switch to Save) to finalize your GPT. Then, start asking it questions related to the content you uploaded.
Shocking AI Confessions
I did a thing.
Problem: There’s a ton of free grant money up for grabs, but the application process can be a real headache. I’ve never actually applied because it feels too complicated. Ain’t nobody got time for that.
Solution: I built a custom GPT loaded with my resume, personal details, me rambling to my notes app, and a few articles about me. Now, with the Tom Babb GPT, I outsource the entire process to someone on my care team. All they do is feed the application questions into the Custom GPT, which knows me and responds in my tone and style. I just look it over, then submit.
See for yourself👇
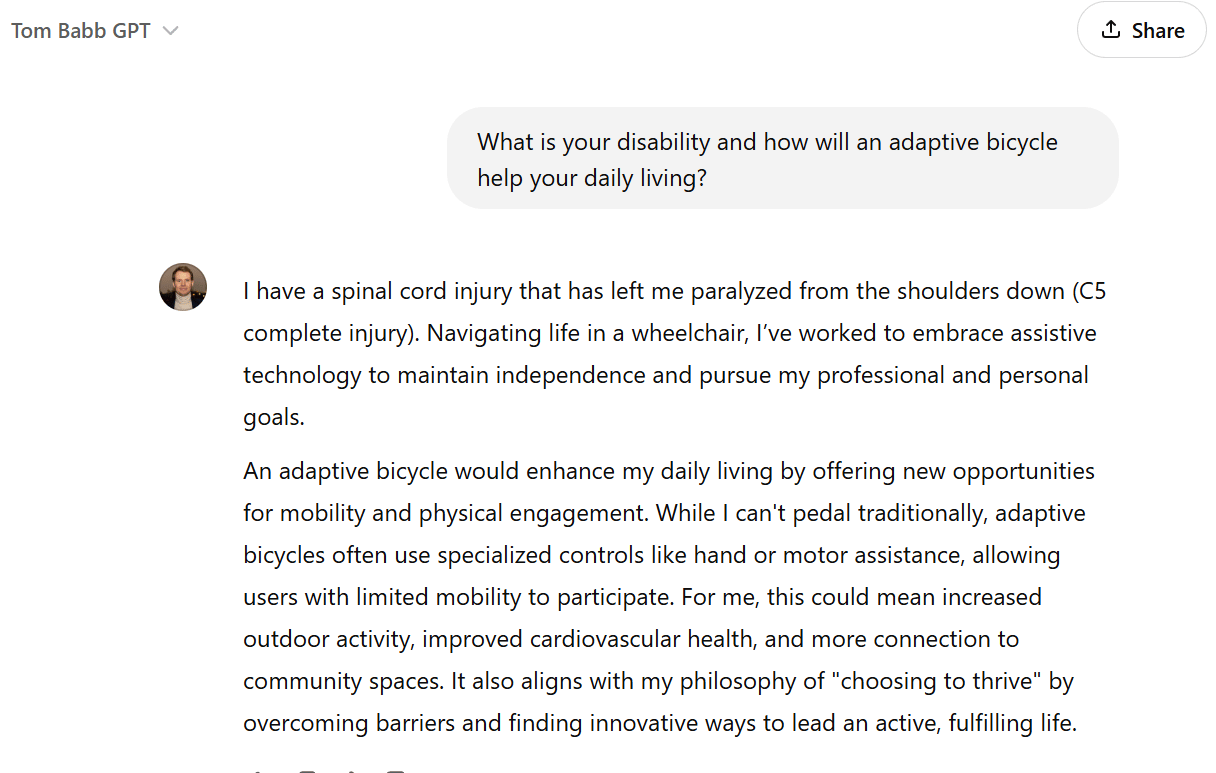
please don't judge me 🤭
Thanks for reading.